This post assumes you know what the VMware on AWS service is. If you are not yet familiar with it, please visit cloud.vmware.com to learn more.
I was assisting a customer with turning the service on and had a hard time locating documentation detailing the process so I captured the relevant screenshots that effectively walks you through turning on the service screen by screen along with some comments that I learned from my specialist team mates on important gotcha’s.
Please make note that these screenshots were captured January 2019. The VMC service is updated every ~90 days, so be prepared for changes in the future. This means webpages will change from what is shown here as more time passes.
Personally, I like to see how things are unfolded instead of just pressing buttons and getting a shock as I do it. Especially with a service that is charged by the hour and there’s no freebie trial (at this time anyways. You never know what the future might bring!).
First, you’re going to console.cloud.vmware.com.
Second, you need to have a myvmware.com account. Usually, you will have one if you are an administrator for your organization, or have been granted rights by the administrator to work with VMware products.
If neither is true, you will create one when you sign up for the VMC service from the website: https://cloud.vmware.com/vmc-aws/get-started
Third, I am assuming your organization has purchased the credits/subscription needed for the VMware Cloud on AWS service!
The other option is to use a credit card. When you signed up at the getting started page, it will have asked you for your contact and credit card information.
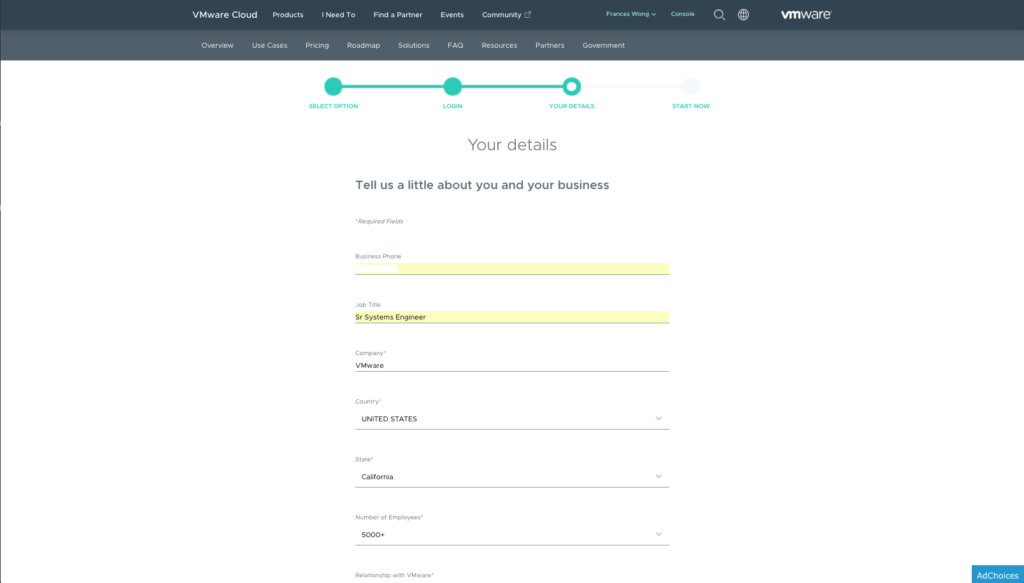
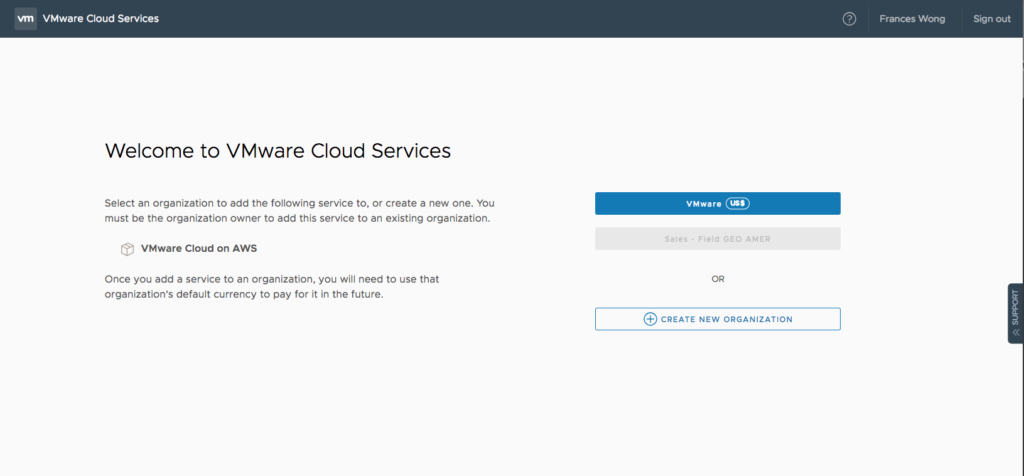
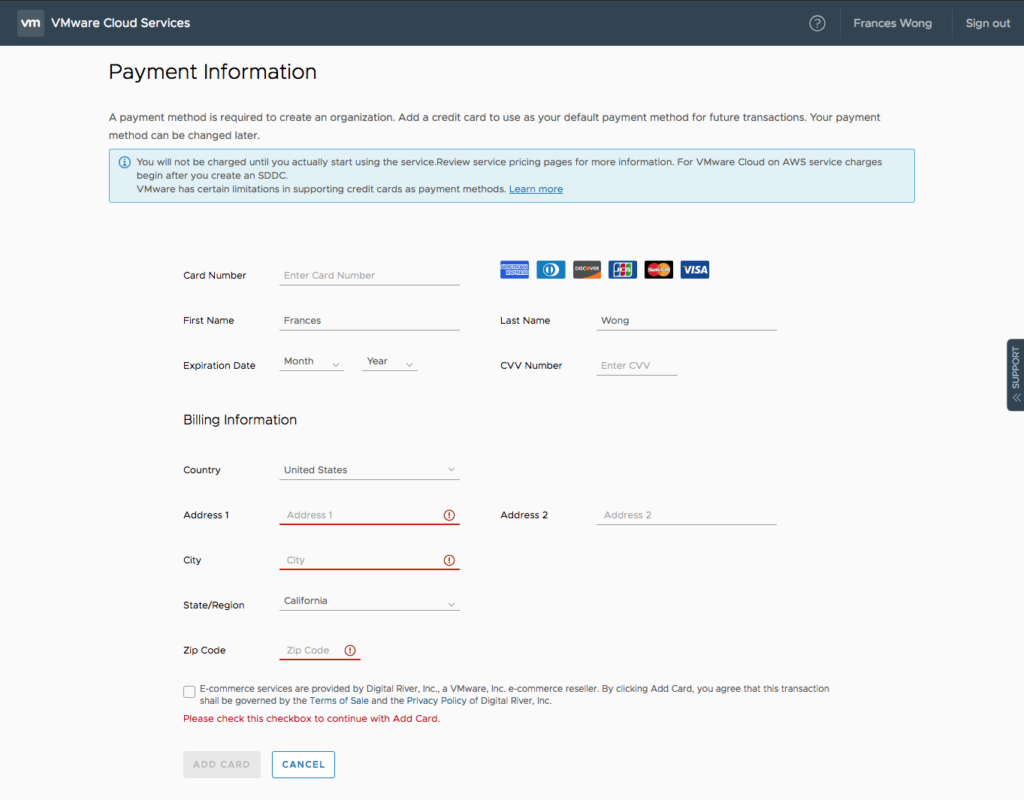
*For those that are redeeming promotional credits for your organization, please contact your VMware account team so they can walk you through that process.
At this point, whether you’re using a credit card or a corporate subscription, you will need to create an organization and the menu’s will look different.
Since the majority of my customer’s were activated by the VMware team, I will proceed as if a client signed up for the service. Whether you use a credit card, a corporate subscription, whether VMware assigned the service to you, or whether you signed up yourself, we will all converge at the same point when we create an organization within the VMware Saas Services.
Ok, let’s go.
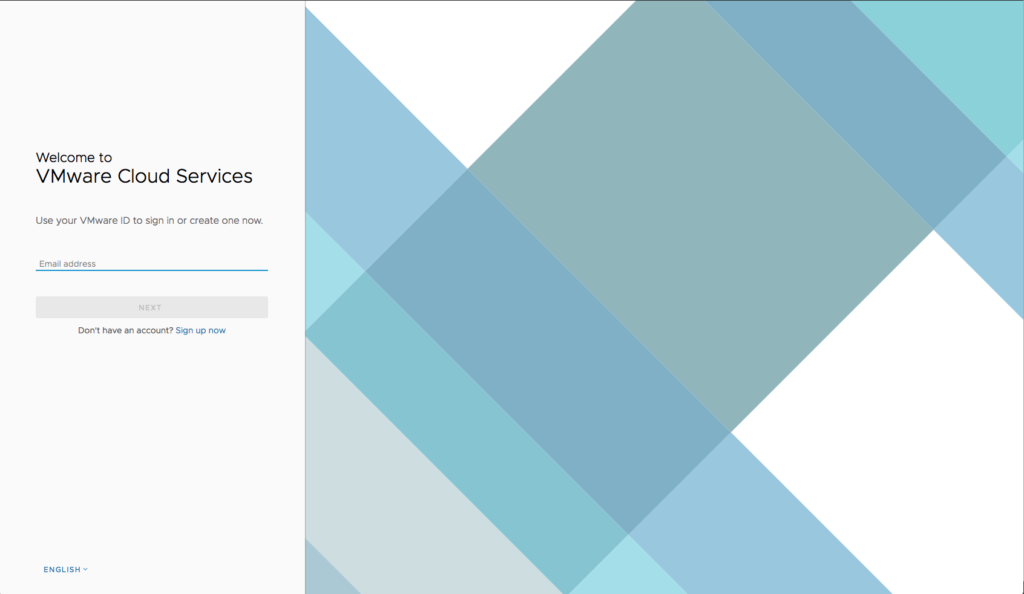
Slap in your account and password and it drops you into the “catalog” of the VMware SaaS services. This catalog is ever changing as VMware is constantly either building new services or acquiring new ones.
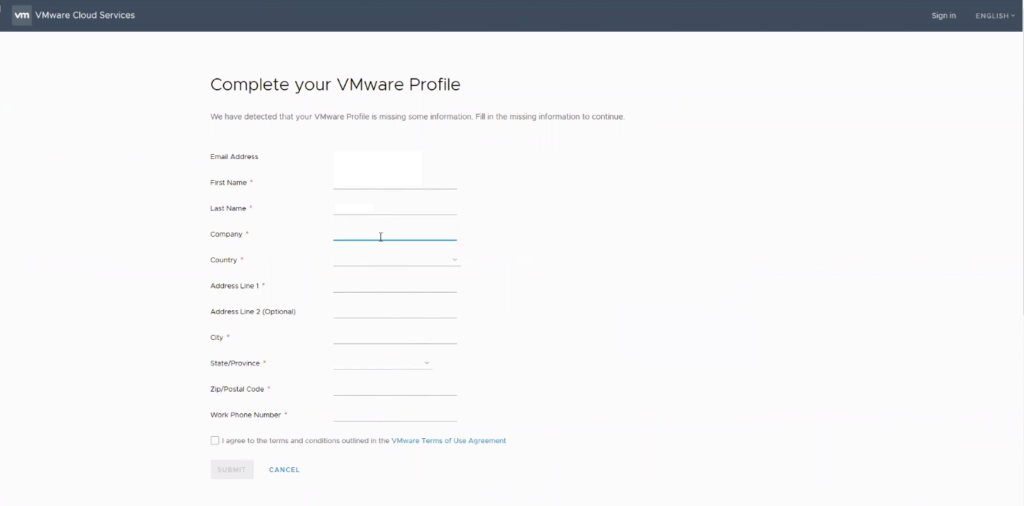
*If you have not logged on previously, you will be asked to “Complete Your Profile” and agree to the terms of service before continuing on.
If you were provided a direct link to the service, it would drop you straight into the start screen of that service. In this case, it would be the VMC service.
*This is the point of convergence. It doesn’t matter what logistical steps you took to get here(credit card, corporate subscription, direct link, etc.). Everyone ends up here.
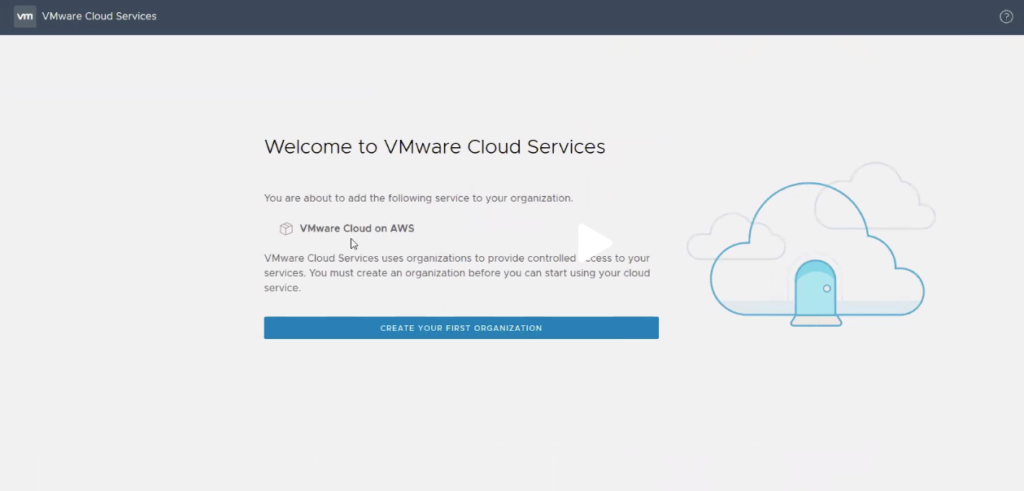
You’re going to Create your First Org so hit the blue button and pick a name.
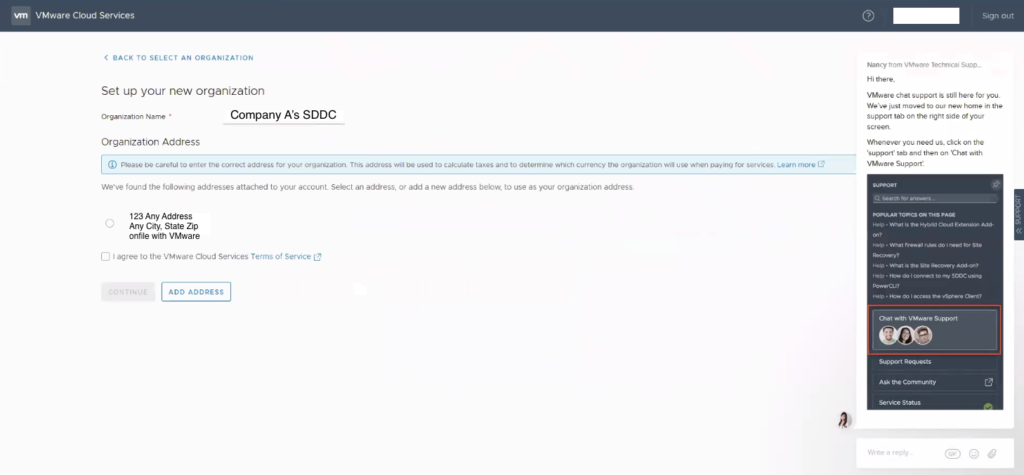
Since this is tied to your existing VMware account, it will pick up any address that was already in VMware’s system. If you need to change it, select Add Address and Confirm.
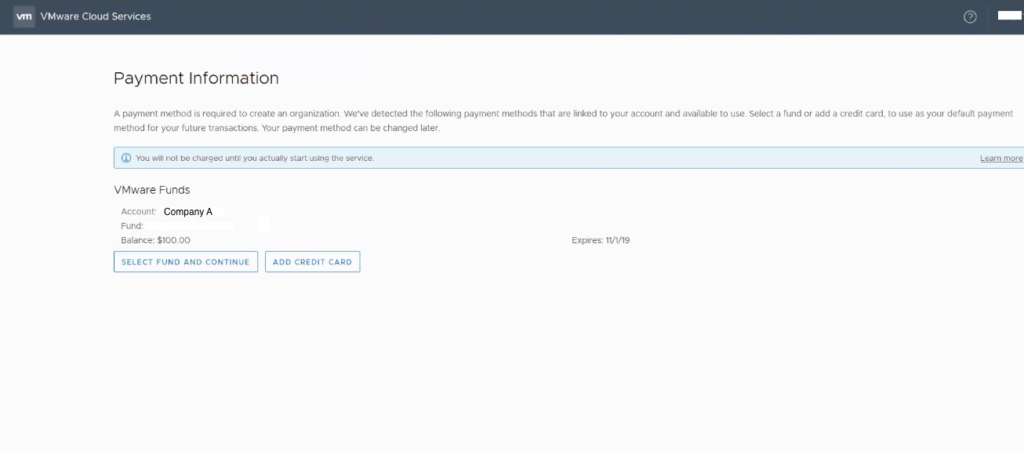
The service cannot operate without being tied to a billing account so for those customer’s that have the service activated, it will drop you into the Payment Information screen and VMware seeds the accounts.
You can also enter a credit card here.
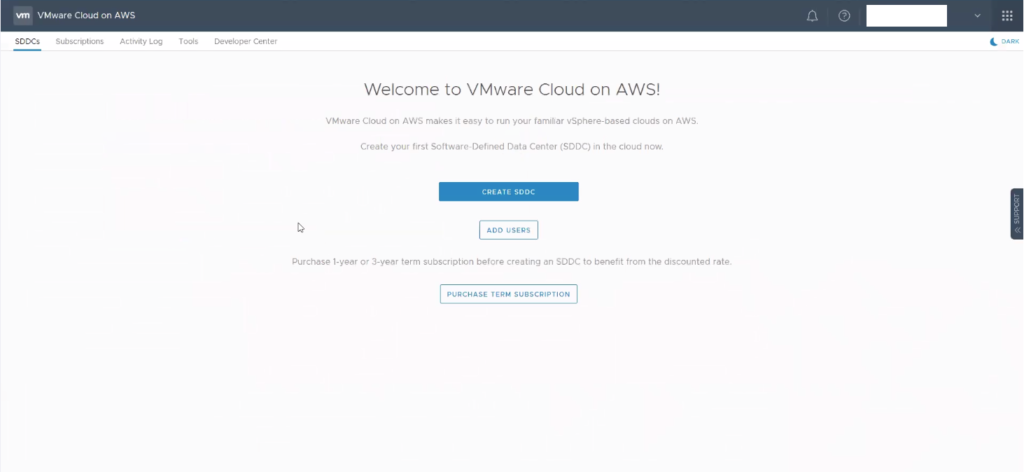
Make sure you visit the Billing & Subscriptions menu to make sure you are tied to the correct method of payment before you begin.
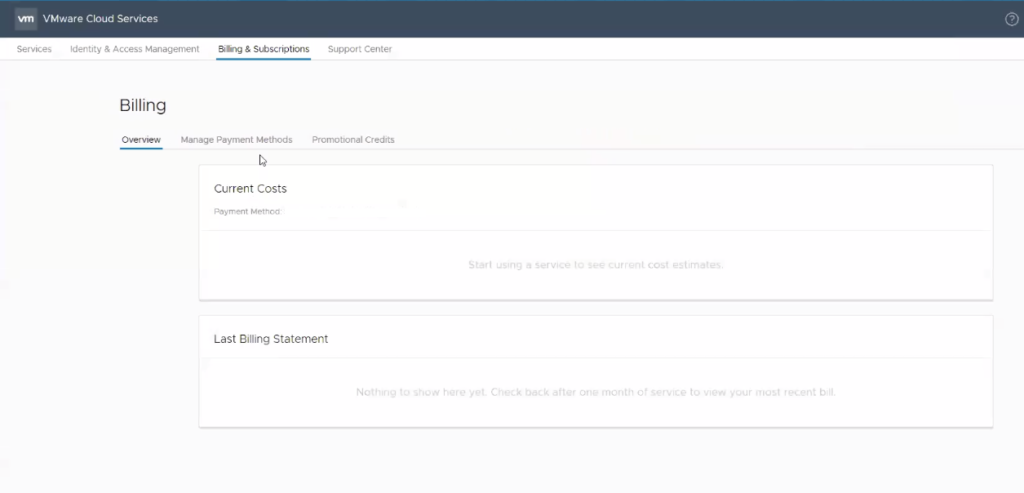
Now that you have the billing squared away, click the waffle icon in the upper right hand corner next to your account name.
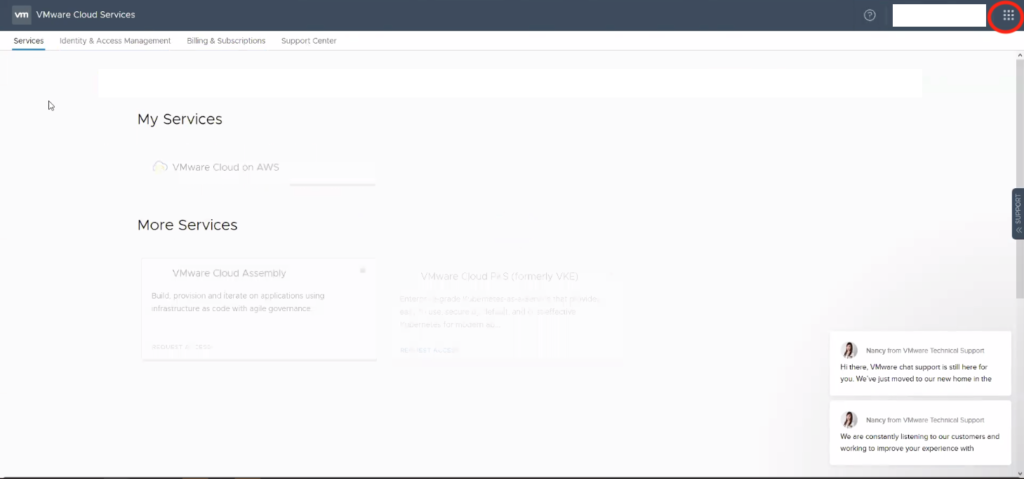
This will navigate you back to the main VMware cloud services catalog menu and the VMware Cloud on AWS service will be listed under my services.
*Note: this assumes you have signed up and been approved for the service if you are not using a credit card.
Click on VMware Cloud on AWS.
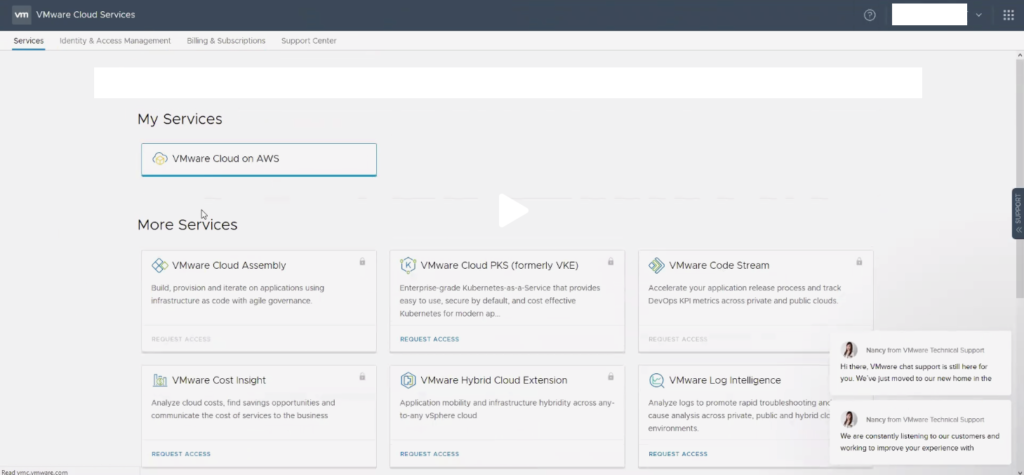
You will arrive at the welcome screen.
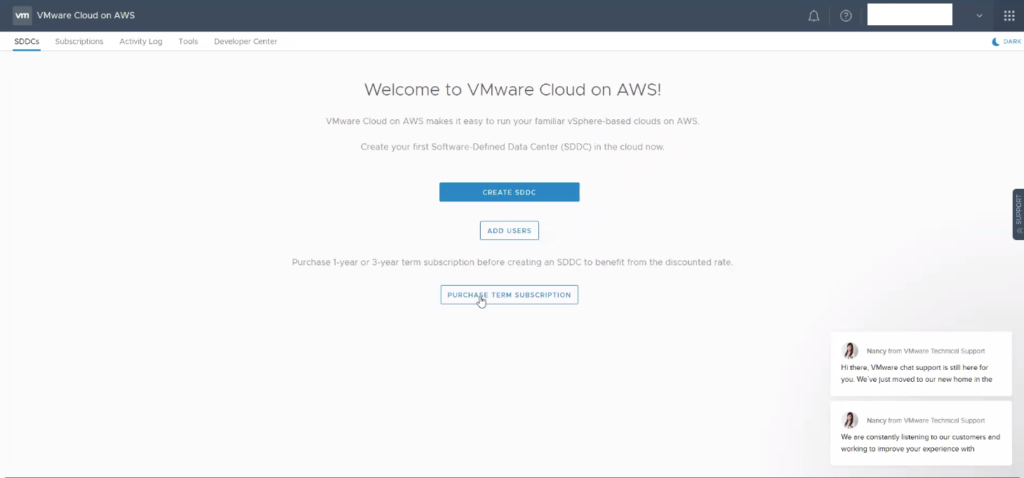
Before we begin, let’s walk through how to add a user to manage this new service. Click on the waffle on the upper right hand corner and select Identity & Access Management from the menu.
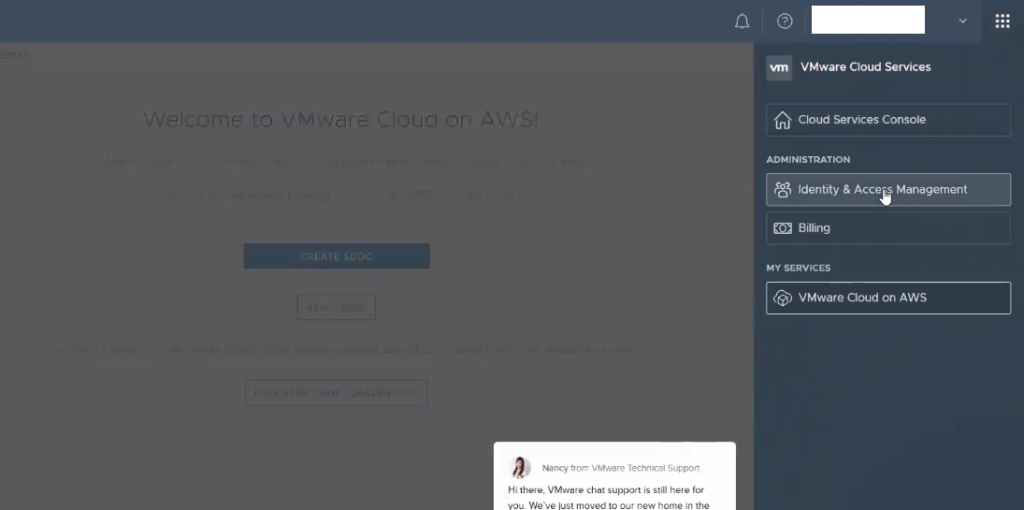
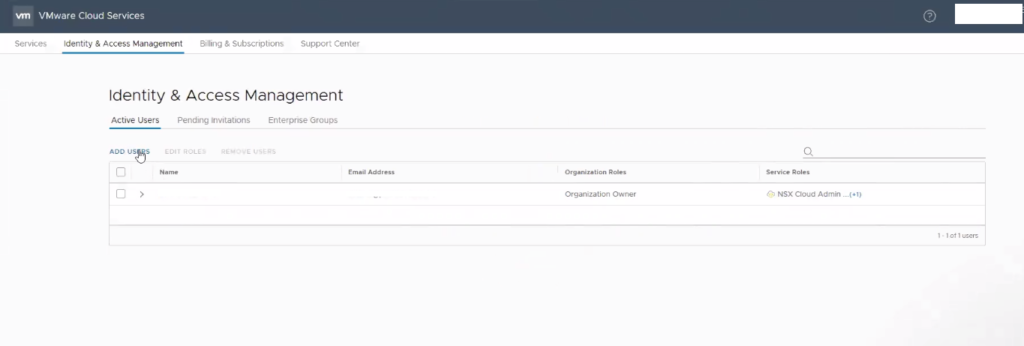
You will be listed as you are the only one in there. Click on Add User.
Type in the email address of your new user.
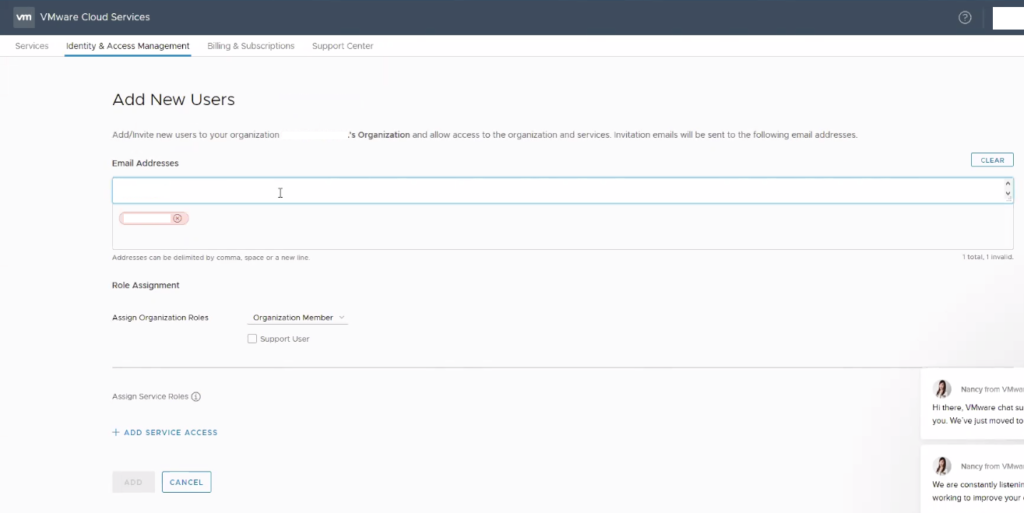
Next to Assign Organization Roles, open the dropdown menu.
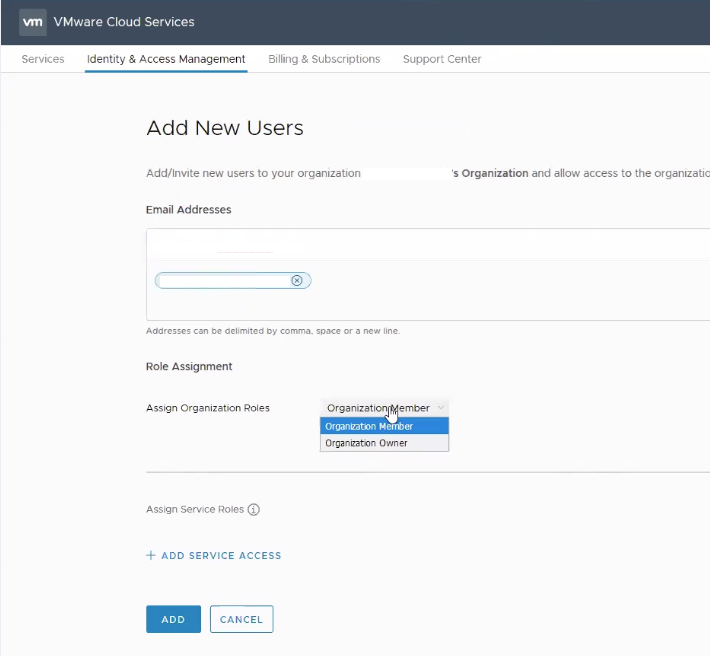
The only difference between owner and member is that owner’s can invite and grant other people the same privileges that they have.

Once you select Add Access, you will select which VMware SaaS services that you are currently subscribed to that you want to grant access to. Select VMware Cloud on AWS and select the drop down menu from roles on the right to deselect NSX Cloud Auditor.

Hit Add to create user and be returned to the User’s menu where you will see a confirmation message in green.

From here, select Services in the upper right hand corner to return to the VMware catalog and select VMware Cloud on AWS to go into that specific service.
At this point, you may get this:
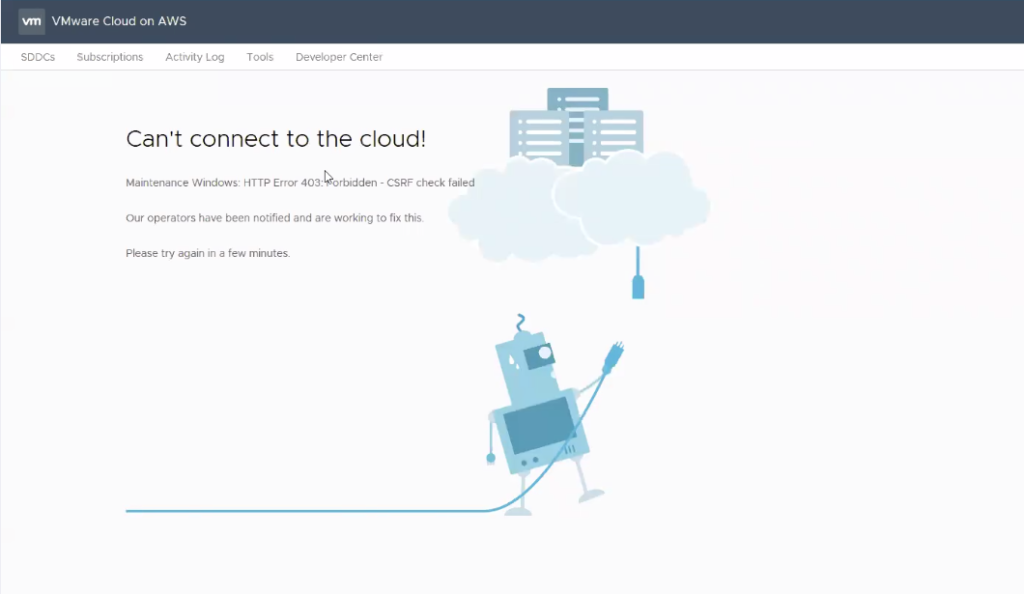
Don’t freak. It’s either because we haven’t cleaned up the error message when you haven’t deployed anything or it’s because you haven’t deployed anything.
Just click SDDC’s in the upper left.
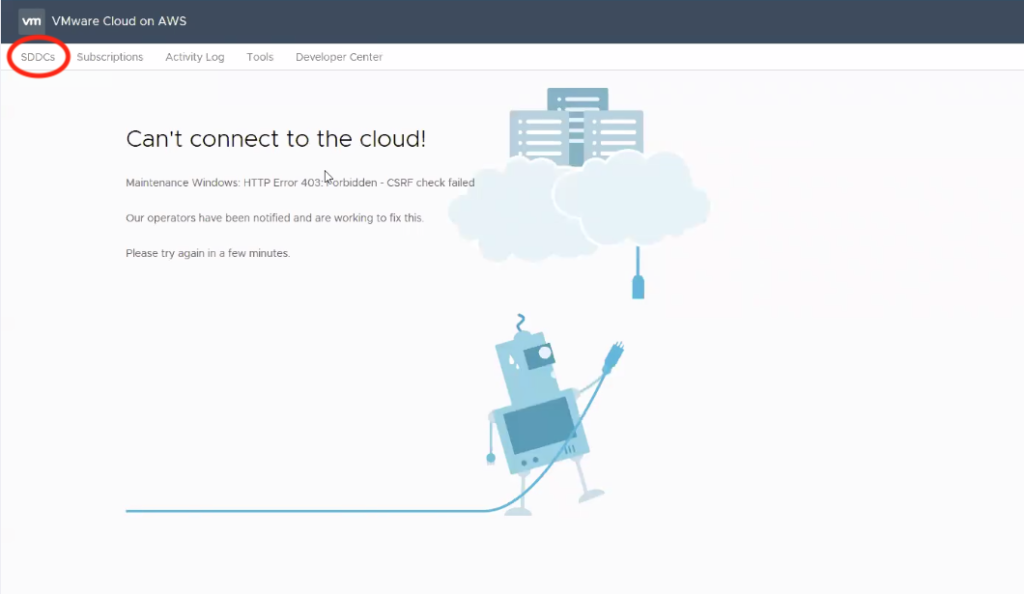
Now we’re in business.
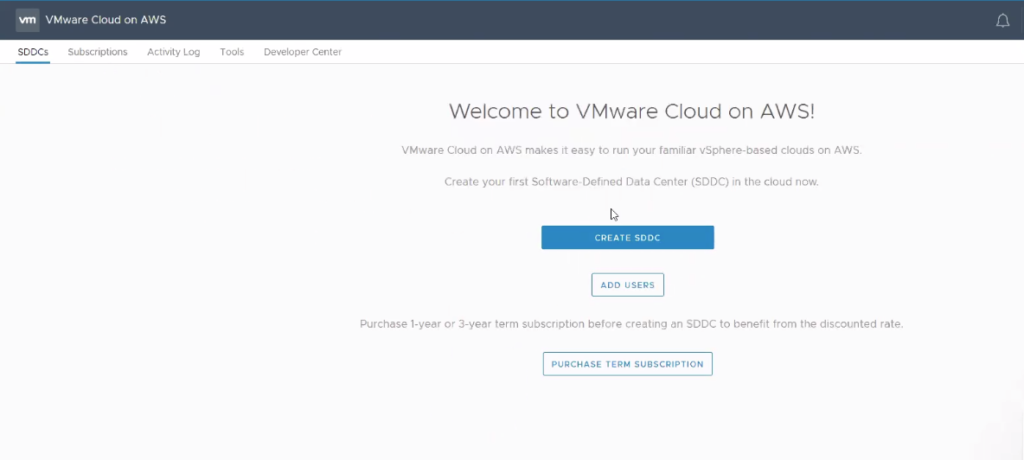
Guess what? Yeah, press the big blue Create SDDC button.
Ok, up to this point, we were just doing logistic’s. Now, we must make technical decisions that impact your infrastructure.
You need:
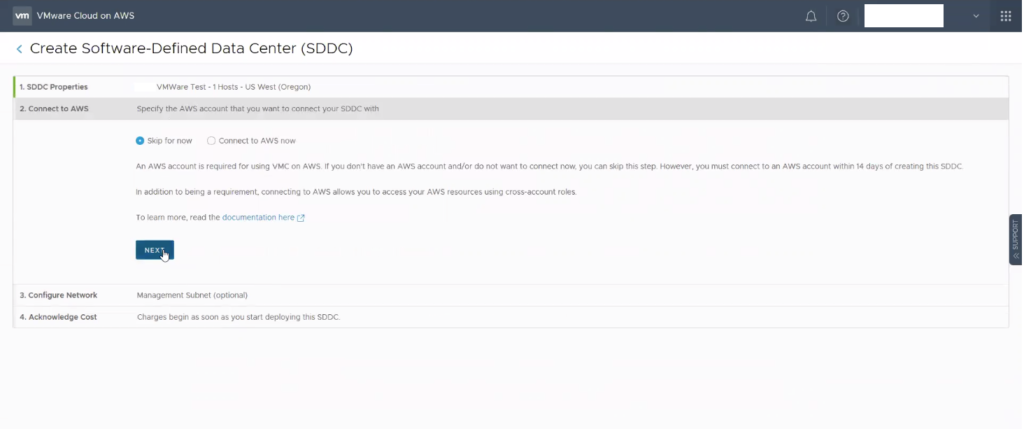
- A pre-existing AWS Account that we can link to. I will not say that this is required as you will soon see that in this post, I’m only going to deploy a single host and it will not force me to link to an AWS account. However, if you plan to use AWS services with your VMC account, you will either need this at the beginning when you press the blue button or you need to link it to the single host within 14 days of deployment.
- You will need to select an IP range that does not conflict with any IP range that is in either your onsite datacenter(which you plan to connect) and your current AWS VPC & subnet (which you also plan to connect). Most people will realize that you will be in deep kimchi if you overlap IP’s and connect networks. This is also not required if you have no intention of connecting networks and this environment is purely temporary, of which a single host configuration is.
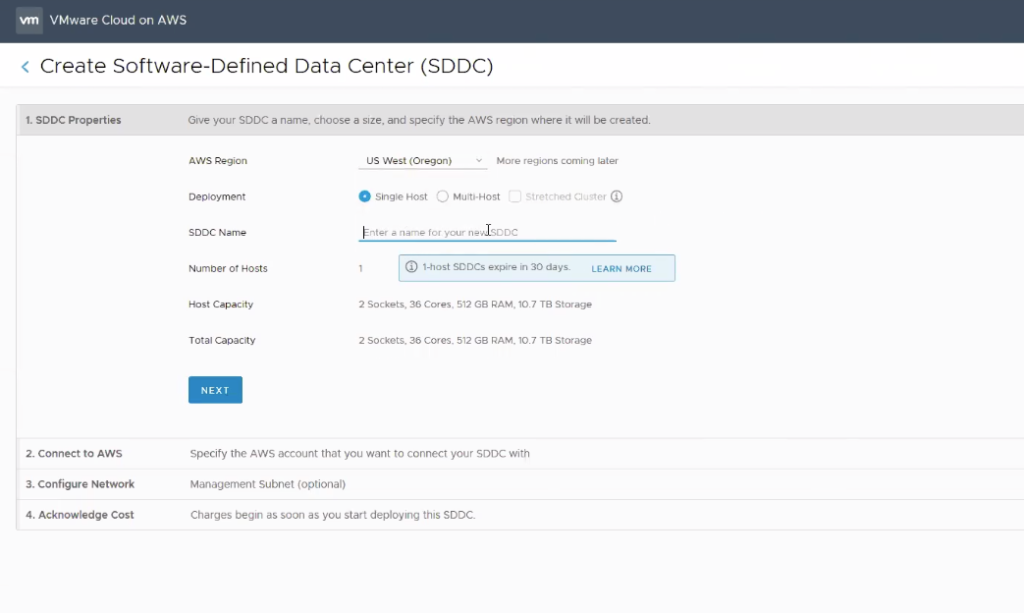
Since the service is being rolled out region by region, not every AWS region will be listed as available. If the one you want is not listed, contact your account team and they’ll be able to find out the time frame of each region or grant you access. Some, like gov cloud is definitely gated.
Name your environment. No, you can’t change it later. Seriously. You have to kill the whole thing and recreate it. No, I don’t know why we don’t allow changes to the name.
As you can see here, we are deploying the single host. If you will be deploying a full SDDC, you need to select 3 or more hosts by selecting the Multi-Host environment and then selecting the number of hosts.
The total capacity displayed will dynamically change as you make the selections.
Hit Next and decide whether you’re going to link an AWS account.
Next, and you come to the very important network selection menu. This selection is most definitely one of those “choose wisely” moments. Cuz there’s no hollerbacks. I’m totally serious. It’s one of those if you want to change it, you must delete it all and recreate it.
10.0.0.0/15 & 172.31.0.0/16 are off limits. You need to specify a /23, /20, or a /16 that doesn’t overlap with anything you have onsite or in an AWS VPC.
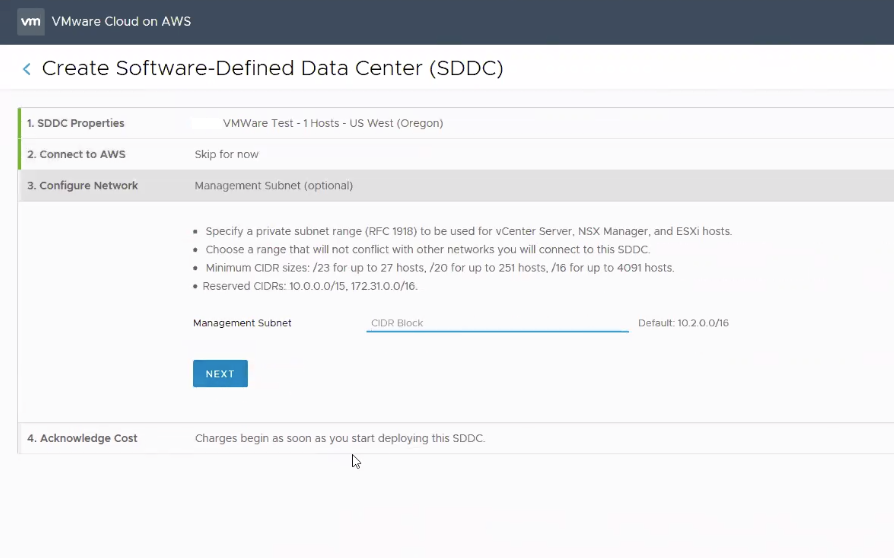
Once a selection is made, we encourage customers to take a screenshot for reference.
Hit Next and you come to the final “You will be charged” moment.
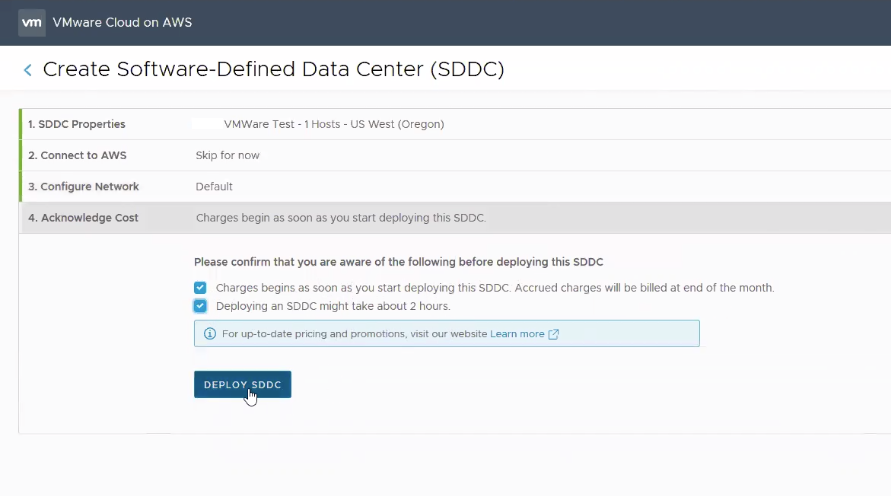
Hit Deploy SDDC and take a lunch break because you’re done!
While the service is deploying, you will see the following screen:
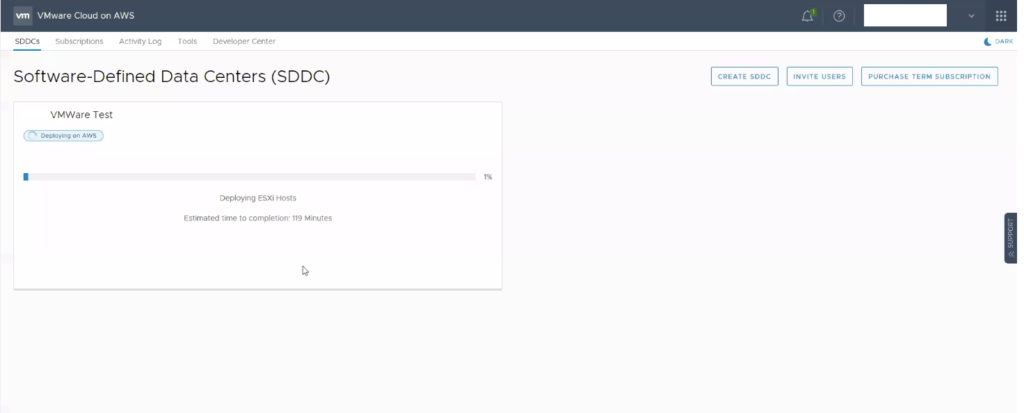
And that is the front to back of spinning up the VMware Cloud on AWS service screen by screen!
Additional useful stuff:
Planning guide with detailed descriptions and guidance
VMware’s Hands On Lab for VMware Cloud on AWS-Getting Started HOL-1987-01-HBD-MYVMW-HOL